

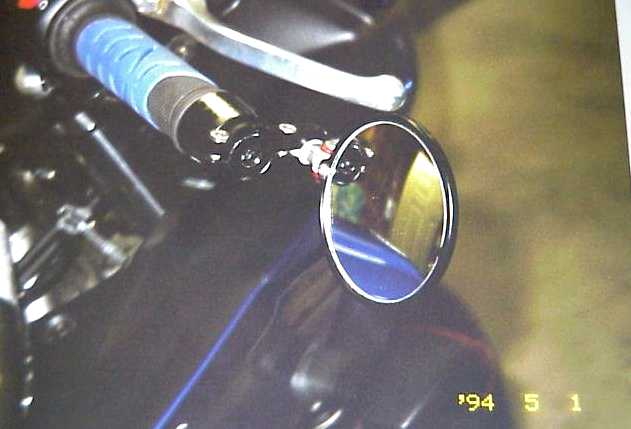
The stock mirrors seem to do a much better job of showing my elbows than any traffic behind. The convex mirror inserts help some but a potentially dangerous situation might still arise that I might miss. So, I installed these bar-end mirrors. A side benefit of this is the removal of what is possibly the least attractive feature of the bike, the stock mirrors.
|
|
I wanted to preserve the bar end weights to maintain their vibration dampening function. There don't seem to be any mirrors or adapters that accommodate the stock weights. I did like the quality of the Constructors Racing Group Hindsight mirrors, particularly the collapsing feature of their "Lane-Split" model. They are not inexpensive at $79.50 each, the price without the collapsing feature is $64.95 each.
 |
| 1600 x 1200 |
The mirrors require a 7/8" OD bar to clamp onto. The tapered bar end weights end in a 1 1/4" OD. No adaptors are available which permit this combination. One possible solution is to machine away a portion of the bar end weight leaving a 7/8" diameter straight portion the required .415" in length (see Addendum II). This, unfortunately, essentially destroys the stock weights meaning you can't go back to stock if you don't like the bar mirrors. Another idea is to tap a thread into the end of the weight for a bolt to screw in. If you ever wanted to remove the weights however you would have to remove this bolt first since unscrewing the weight using the bolt would just unscrew the bolt. I settled upon what seems to me like a simpler approach.
My solution was to drill a 1/4" hole all the way through the bar weights. I had this done by a professional machine shop who used a precision lathe to center the weight. A regular drill bit worked fine, no carbide or diamond bit was necessary. The 1/4" size was selected because it didn't harm the existing 8mm Allen socket in the end of the weight. The ability to return to stock is preserved since the hole in the weight is not visually obvious. You do lose the weight of the mass drilled out but this is offset with the additional mass of the material added.
 |
| 1600 x 1200 |
A 1/4" X 4" stainless hex bolt inserted through the weight holds a washer stack of the proper thickness and diameter to form the 7/8" OD tube the mirror bracket requires. A proper spacer of the right length and proper inner and outer diameter would have been preferable but this would have had to have been custom machined. The washer stack is not as elegant but works very well. The inner washer is nylon to protect the finish of the weight. The next four washers are zinc fender washers. Next, one stainless washer slightly thinner then the zinc washers is used to finely adjust the length of the stack. The combination of these six washers when assembled is just slightly longer then the .415" width of the mirror bracket. Apparently the whole is greater than the sum of the parts. The outer washer of 1" OD prevents the mirror bracket from migrating outwards. The 1/4" washer and nut holding the bolt onto the weight have a diameter smaller than the 16mm thread of the weight so it can still be screwed onto the bar. Note that it is possible to tighten the bolt onto the weight and the mirror bracket still turns freely on the washer stack so it can be adjusted. Purists may prefer to use Metric equivalent bolts and washers.
 |
 |
| 1600 x 1200 | 1600 x 1200 |
The weights are screwed into the bars and tightened using the exposed stainless bolt end with a 7/16" socket head. The mirrors are tightened onto the washer stack with a 4mm Allen wrench. Adjusting the tension between the front and rear allen screws permits the mirror ball joint to move for adjusting the mirror and also ensures the mirror bracket is tight.
 |
 |
| 1600 x 1200 | 1600 x 1200 |
 |
 |
| 1600 x 1200 | 1600 x 1200 |
 |
 |
| 1600 x 1200 | 1600 x 1200 |
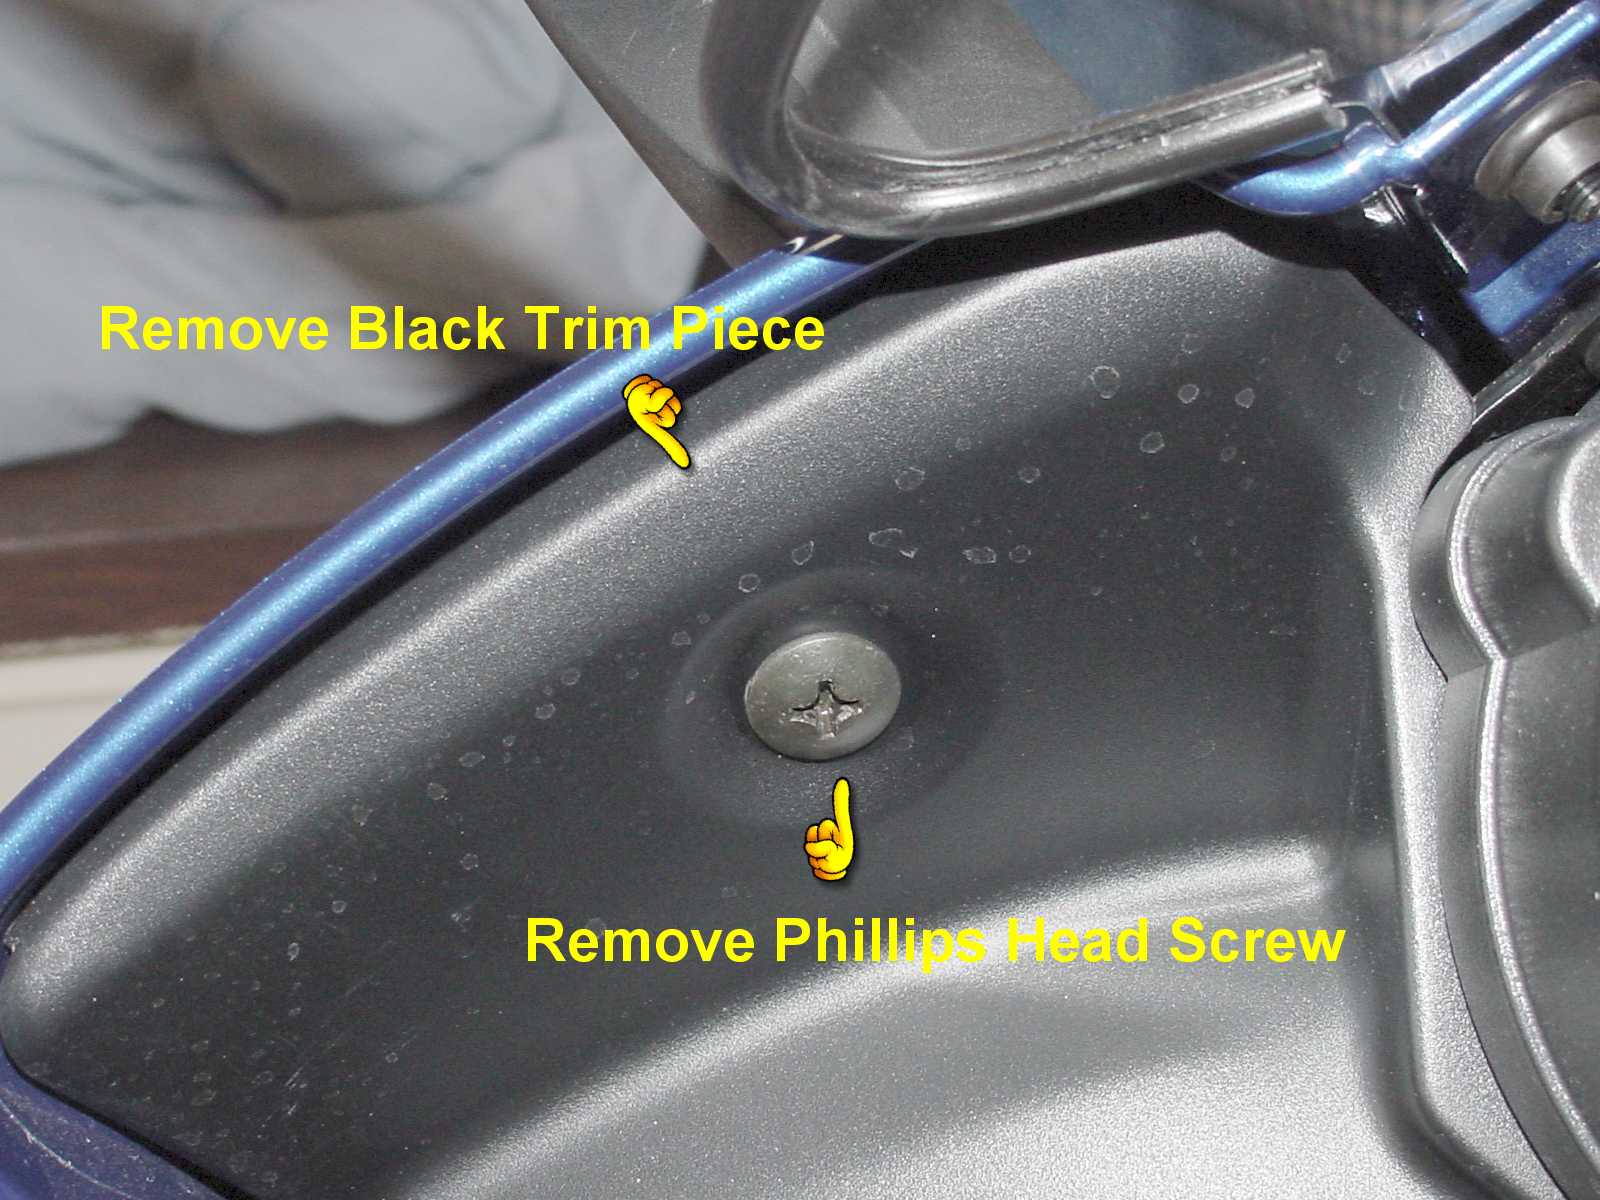
The removal of the stock mirrors is started by removing the two side fairing inserts.
 |
 |
| 1600 x 1200 | 1600 x 1200 |
Two hex nuts hold down each mirrors. Mine were very loose. In fact, my left mirror was attached with only one nut! With the hex nuts removed the mirrors can be pulled out of their mounting holes.
 |
 |
| 1600 x 1200 | 1600 x 1200 |
Removing the mirrors leaves unsightly holes in the fairing. What I did to cover them up was to use a plastic hinged screw cap cover over machine screws.
 |
 |
 |
| 1600 x 1200 | 1600 x 1200 | 1600 x 1200 |
 |
 |
|
| 1600 x 1200 | 1600 x 1200 |
I quickly got used to using the bar end mirrors. It's nice not to see the large stock mirrors in the way. You get a cleaner front view. You have to look down a bit to use the bar end mirrors but with the slightly convex glass you get a good view. You can even see directly behind with either mirror! The first time out required some adjustment to place them above my outstretched arms and to experiment with the best position for viewing behind and to the side. It's a good idea to bring along a 4mm Allen wrench with you that first time to ether loosen or tighten the screws during the adjustment period. I experienced no vibration problems. When properly tightened they hold their position very well.
A bit of WD-40 on the folding hinge helps that function work smoothly and prevents it from tightening up. That folding feature also absorbs inadvertent nudges as you pass by the bike in the garage that would otherwise cause the mirrors to become misaligned.
 |
Addendum:
Dissatisfied with the look of the plastic screw caps, I ordered the polished aluminum mirror hole covers
from Schnitz Racing.
They are CNC machined and are of high quality. Price is about $59 for the pair. I wasn't sure
which way they should go. This direction seems to look the best.
Addendum II:
A member of the Owners Association, David Cheek went the route of machining the ends of the stock
bar end weights to 7/8" for a mounting point. He also machined off the inside step on the throttle side to make a better fit with
the longer Gel Grips without having to move the controls. Cost was $20 at a local automotive machine shop.
Another member of the Owners Association adapted the bar ends for the CRG mirrors. Check out Jon's Page for more on this.
Addendum III:
The Schnitz Racing mirror hole covers have been replaced with modified Rizoma mirror hole covers. I modified
a set of these to hold an LED which serves as a running light and turn signal.
See here for a description of that modification.
Addendum IV:
Owners Association member, screen name 'FZSarasota' suggests some alternate procedures.
(1) Pat uses a 1/4" bolt.
(Design Change): I decided to use a 4" long, 1/4" wide Hex Bolt (So I could use an allen wrench). I found them at Ace Hardware,
Home Depot had smaller selection of bolts (they didn't have the 4" long hex bolts)... I just thought it would look better, but it's only a
cosmetic change to "Pats" design.
(2) Pat seems to have placed loose washers on Bolt when assembling.
(Design Change): I decided to fuse washers together using high strength super glue before assembly (super glue for metal use).
(Step 1): I wrapped extra 1/4" bolt with electrical tape so that the washers would be perfectly aligned when stacked. I then placed a
couple drops of super glue on washer, then placed another washer on top of that.. I did that with "8" washers, making sure they were
in perfect alignment. I then popped the whole "washer adapter" off the bolt and prepped them for painting.
Note: Super glue is not what will hold the mirror on, it only holds the washers together.
(Step 2): I noticed that not all washers were the same size (I mean only 10ths of a Millimeter off)... I sanded the circumference of
washers until they were all level and smooth. When I was done, the whole glued stack look like one unit (almost, you could see faint
lines between them).
Painting them Black.
(Step 1): I sprayed them with primer paint first. Let dry for 1 hour...
I assembled them just like Pat said on his web page.
(Design Change): I wrapped electrical tape around 4" hex bolt where washers placement will be. I did this so when washers are
placed on bolt, they would be perfectly centered. You will have to play with how much tape goes on so washers will slide on snug, but
not bunch the tape.... Cut off extra tape protruding past the washers on hex bolt so tape won't wedge between washer adapter and
bar end weight... This should act as a damper also for the mirror (the rubber tape might dampen vibration down a little).
Addendum V:
Another innovative modification from Steve Young:
My solution was to move the grips and switchgear inward on the handlebars by 1/2". This requires grinding the locating pins on
the switch housings off with a Dremel. My throttle housing holds tight even without the locating pin, but the left side
is a little loose. I fixed that with a couple of turns of friction tape. Result of this is that the inner shoulder of the
handlebar weights is now exposed. It's very easy to slip the mirror over the weight, screw the weight in, then tighten
the mirror.
Last Updated: 05-23-2003
Copyright © 2001-03, Patrick Glenn, All Rights Reserved.
The information presented here reflects solely my personal experience with my motorcycle and is presented
for entertainment purposes only. No information presented here is to be relied upon for issues of rider safety
nor to replace the services of a qualified service technician.
Any attempts to follow or duplicate any of these procedures are done so completely at your own risk.
By reading the information on this site, you agree to assume complete responsibility for any and all actual
or consequential damages that may arise from any information presented herein.


1600 x 1200
1600 x 1200


1600 x 1200
1600 x 1200
1600 x 1200


1600 x 1200
1600 x 1200
(Step 2): I sprayed them with black paint. Let dry for 1 hour...
(Step 3): I sprayed them with clear coat (satin finish) Let dry for 1 hour...
(Step 4): After the last coat dried, I placed newly painted washer adapter in oven at 115 degrees for 2 hours to cure them.


Back to Main Page
Yamaha® and FZ1® are registered trademarks of the Yamaha Motor Corporation.
This site is not affiliated in any way with the Yamaha Motor Corporation.