Start by installing the frame clamp. The instructions lists the torque spec of the bolts
as 5-9 Nm. I went with the high number as with all the other torque specs.
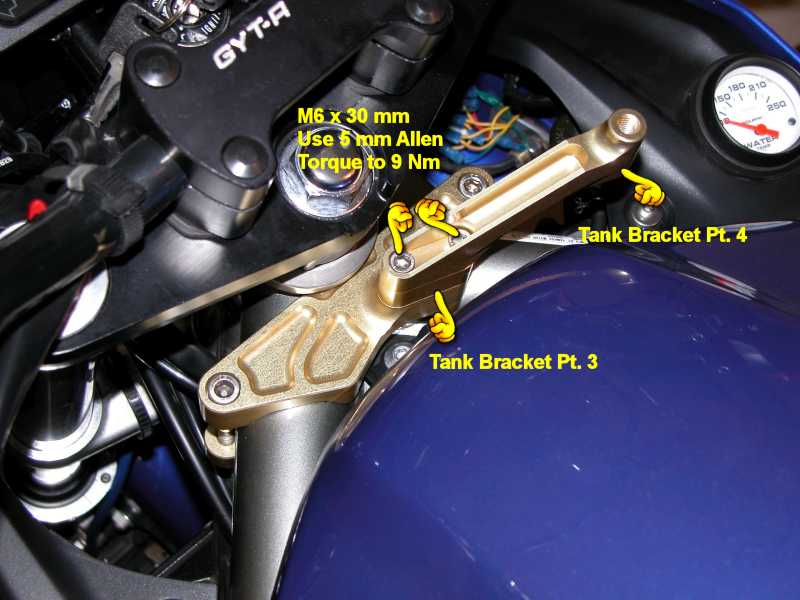
Add the bracket arm. Same torque spec, 5-9 Nm.
Pre-assemble the fork bracket. I couldn't fit a socket for the torque wrench in there so I used a long
handled hex key and tightened the bolt securely using pliers to add just a bit of leverage. I tried
not to make it too tight. The spec is, again, 5-9 Nm.
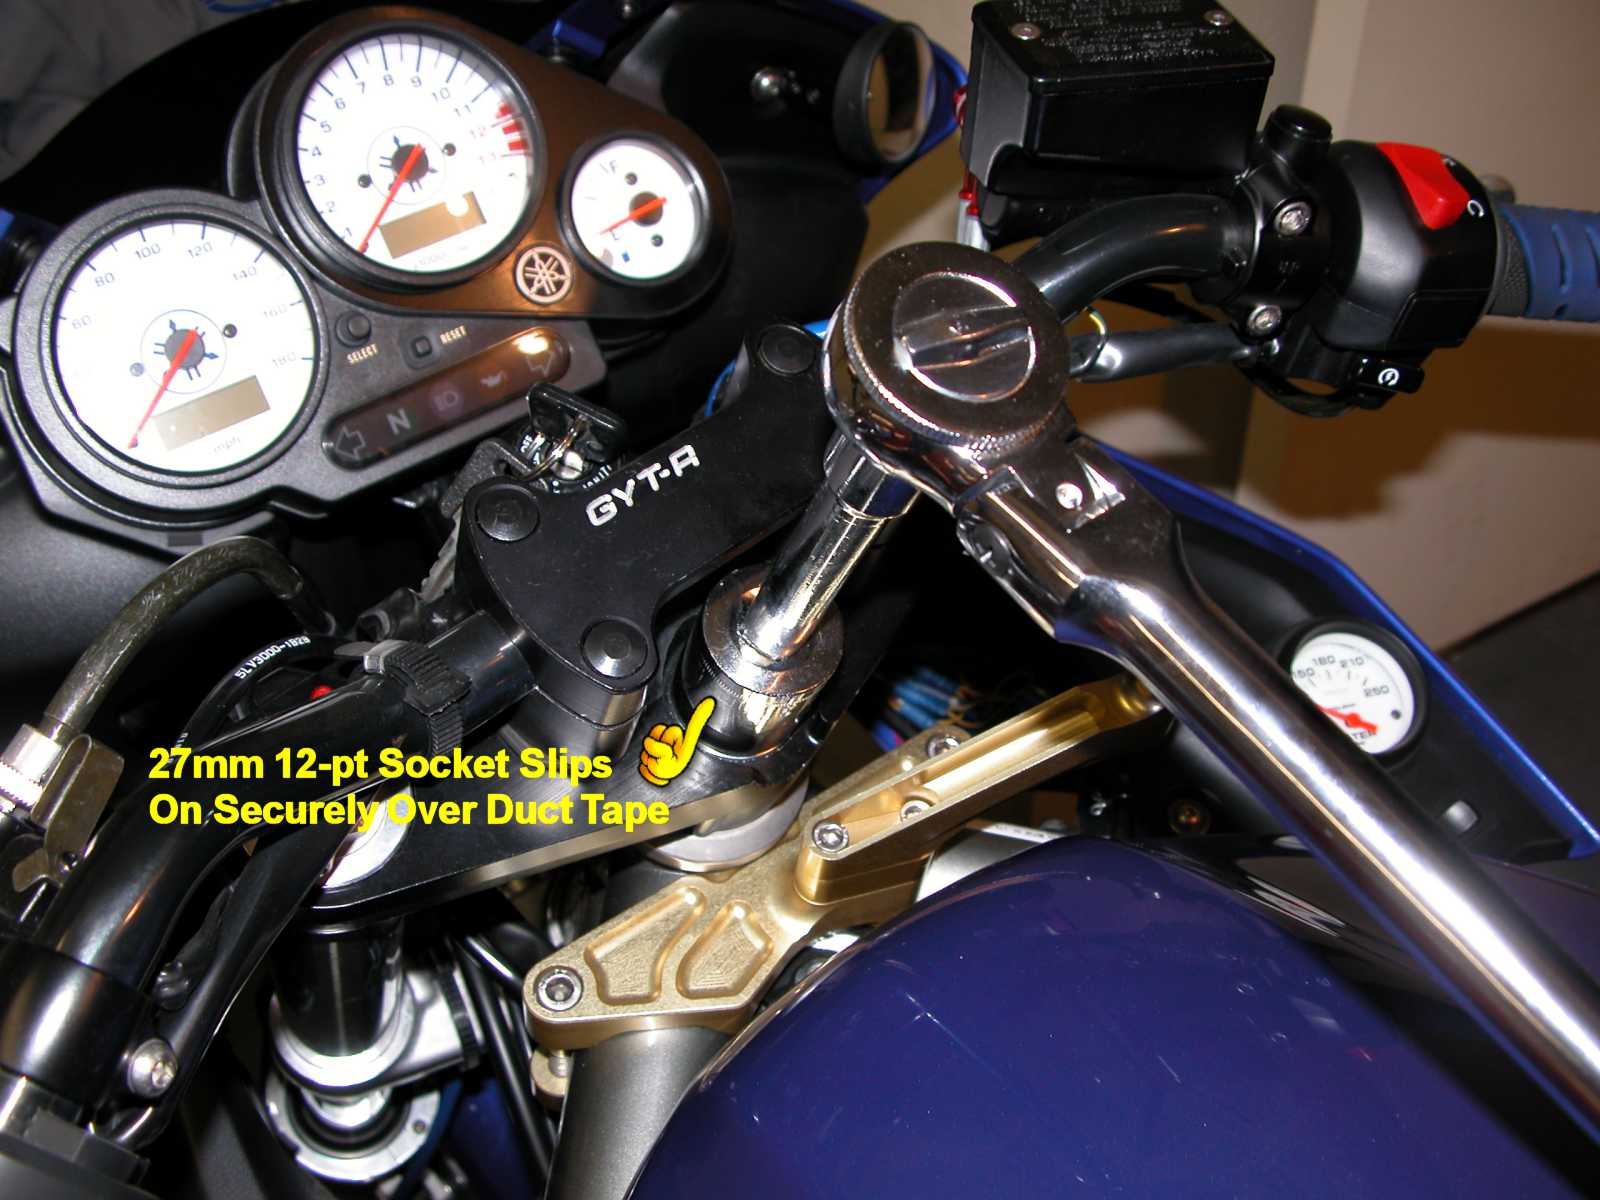
Install the fork bracket. I used some duct tape to protect the chrome finish of the cap nut. The 12 point
socket fit securely over the nut in spite of the tape. The tape keeps the nut in the socket when it is
removed. Next, remove the standard washer. It's recessed in there, fits tightly, and is difficult to remove.
I used duct tape stuck to the washer to slowly lift it away then rocked it back and forth over the spindle.
Next, install the fork bracket and replace the cap nut. The instructions list the torque spec as 55-75 Nm
but the factory spec for that nut is 110 Nm. I used the tighter factory spec.
Slide the damper in the fork bracket clamp and attach it to the bracket arm. First remove the plastic
ball joint protector by pulling it apart. Slide the damper into the loosened clamp with the adjustment knob
end first. Orient the rotated position of the damper according to your aesthetic preference. Next,
assemble the attachment bolt with the washers and spacers and attach the damper to the bracket arm.
The torque spec here is 14-17 Nm.
Position the damper laterally in the clamp. The distance between the clamp edge and the end of the
tube must be 24 mm as shown. When properly positioned, tighten the clamp to a spec of 6 Nm, not too tight.
Make sure the damper is level and propery aligned.
Verify the lock clearance and that the damper does not bottom out it's travel at full lock. You can
adjust the position of the tube if this happens. Right lock was ok but left lock was obstructed by
the bars because of my lower bar mounts. Argghhh! There is no damper adjustment that will fix this.
Rather than give up on either the lower mounts or the damper I rotated the bars a bit to increase the
clearance. This is not a completely successful solution because the bars still contact the adjustment knob at
nearly full left lock. I can still key lock the bars at left. This does violate one of the safety
warnings but I'm going to try this and see how it goes. At worse I can go back to the stock bar mounts.
Completed installation.
Adjust the Damping:
The damping is speed sensitive. Slow movement of the bars exhibits almost no damping. Quick or abrupt
movement results in the damping becoming effective. Turn the adjusting knob ClockWise to increase
damping, CCW to decrease damping. Start with no damping
(fully CCW). Adjust the damping only 2 clicks (1/4 turn) at a time until you are satisfied. The
instructions warn never to use the maximum setting.
Ride Report:
The left lock problem is not an issue when riding or maneuvering the bike. I'm still not happy with that
but I'll leave it for now until a solution presents itself.
During normal riding the presence of the damper is not apparent. That is the way it should be. I'm not
about to deliberately induce a tankslapper condition to see if the bike comes out of it. Hopefully I'll
never know.
Update:
I decided I really didn't want to go back to the unrotated, higher, and further away, bar position so I accepted a
different compromise. I rotated the bars
back to where I wanted them but artificially limited the steering lock travel so that the bars don't bang into the damper at left
lock. Another disadvantage to this approach is that I also lose the use of the steering key lock. One big advantage
though is that in the event of an accident, the bars will likely not come crashing into the side of the tank. The bars
are rubber mounted and will extend beyond the lock if sufficient force is applied. This should provide some safety
cushion. I really don't like these compromises and the limited steering travel but this is where I am.
Update II:
I couldn't live with the steering lock limitations. Low speed maneuvering was too limited and the
increased turning circle was a real pain. Add to that the inability to lock the bars with the key
and that was it. I removed and sold the HyperPro damper. I just couldn't make it work with the
lower bars.
Update III:
yamahablue from the Owners Association found a solution to the interference problem. He repositioned the
damper using a fabricated aluminum piece inserted between the bracket sections. This repositions the damper and permits
its use with lower bars, even the Suburban Machinery Type II bars with the factory lower bar mount.
Last Updated: 12-29-2003
Copyright © 2001-03, Patrick Glenn, All Rights Reserved.
Yamaha® and FZ1® are registered trademarks of the Yamaha Motor Corporation.
This site is not affiliated in any way with the Yamaha Motor Corporation.
The information presented here reflects solely my personal experience with my motorcycle and is presented
for entertainment purposes only. No information presented here is to be relied upon for issues of rider safety
nor to replace the services of a qualified service technician.
Any attempts to follow or duplicate any of these procedures are done so completely at your own risk.
By reading the information on this site, you agree to assume complete responsibility for any and all actual
or consequential damages that may arise from any information presented herein.


